01 Mar How to Strip…Woodwork
There are several ways to strip. Some are hard and time-consuming, while others are much easier and quicker. But the question remains…why strip at all? There is nothing wrong with painted woodwork, in fact, many styles and periods of homes cry out for painted woodwork. But if you want the natural look of wood or your woodwork is intricately detailed, yet buried under many layers of paint, then strip you must.
Sanding your woodwork down to the bare wood is probably the hardest method of stripping there is. Think about it for a bit and at the end of this month’s article, we’ll see if you came up with the reason why.
Strippers come in three basic categories: quick, medium-fast and slow acting. As a rule, the faster the stripper, the more hazardous it is.
If at all possible, strip your woodwork outdoors. This requires you to remove the woodwork, a potentially damaging job that can easily ruin whole sections of trim. For example, in one of my bedrooms, the trim around the door is basic, 3/4″ boards, 4″ wide. There is a decorative trim piece nailed to the face of the board which gives it a highly detailed look. But this added trim is very thin at one edge. If I were to pry this trim off, I would break most of it. This trim I would probably strip in place. It could also be removed by taking a nail set and carefully drive the finish nails holding the trim in place all the way through the trim. Once all the nails are driven through, the trim should come right off with minimal effort…paint layers being the only thing holding it in place. If you must strip indoors, pick a day when you can open windows for ventilation, in addition to wearing an organic vapor respirator.
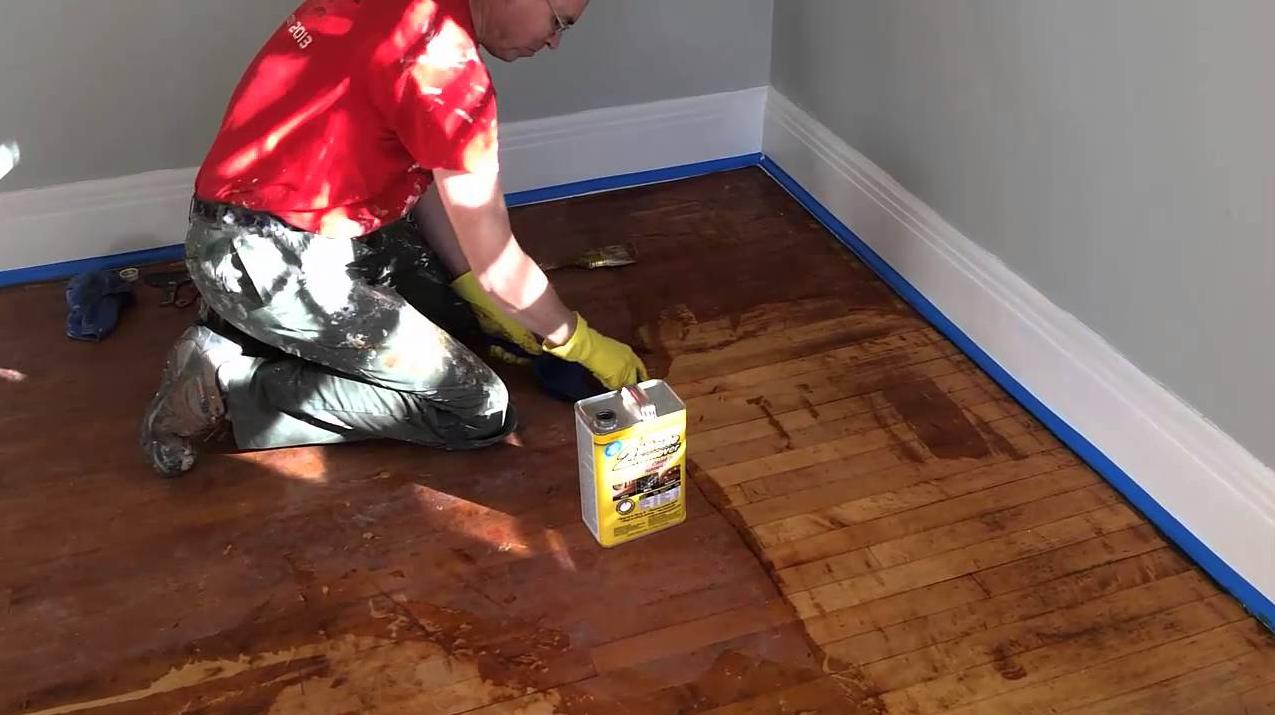
You will also need rubber gloves, old work clothes, masking tape, goggles, an old paintbrush, and plenty of newspaper. To remove the stripper, a putty knife, different size pointed sticks, scrub pads, a plastic scrub brush, plastic garbage bags or sheeting, some string and wood shavings are all helpful. If any extra precautions are needed, they will be mentioned under the specific type of stripper.
Table of Contents
Quick Acting Strippers
These type of strippers contain methylene chloride as the active ingredient. Methylene chloride strippers work from the bottom up, causing the paint to let go of the wood and comes up in sheets. It takes as little as 10 minutes for these strippers to work, but some finishes may need up to an hour. Be sure to use an organic vapor respirator and have plenty of extra cartridges available. Rubber gloves are not effective with these types of strippers because methylene chloride will go right through them. You will need chemical-resistant gloves.
Breathing methylene chloride vapors lower the amount of available oxygen in the blood and can also aggravate the symptoms of heart disease, irritate skin and lungs and may cause cancer. If you are pregnant, elderly or have heart disease, don’t use these types of strippers.
Medium-Fast Strippers
Strippers of this type use a mixture of solvents, including small amounts of methylene chloride. Proper ventilation is still required with these strippers, as are gloves and goggles. They work from the top down, turning the finish into a jelly-like mess. These strippers usually need to sit for up to four hours. Apply the stripper and then wrap the woodwork in plastic to keep the stripper from drying out.
Slow Acting Strippers
If you are planning to work indoors, these types are the safest you can use. The biggest drawback is they need to sit overnight (sometimes even up to 24 hours) and it is very difficult to keep the stripper moist that long indoors. You can cover the trim with plastic sheets, using painter’s tape to seal the plastic along the walls and floor. Being water-based, it will raise the grain of the wood and can loosen veneers.
Once the finish is loosened, use the putty knife to remove as much of the finish as you can. Spread the finish and stripper on a newspaper as you go, so that the stripper can dry out before you throw it away. Use the pointed sticks, string, scrub brush, scrub pads and wood shavings to remove the finish from the details in the woodwork. If the stripper begins to dry, add a bit of fresh stripper to the area. If some of the finish remains, re-apply the stripper, cover it back up with plastic and let it sit. Don’t try to force the leftover finish off, you may damage the wood. Let the stripper do the work.
After you have all the finish and stripper off the trim, wash it with the recommended cleaner. This can be found by reading the label of the stripper container. Once the trim is washed, let it dry overnight and then lightly sand with a 400 to 800 grit sandpaper to knock down any raised grain. Your trim is now ready to refinish.
****The reason you do not want to use sandpaper to remove the finish is because the finish will clog the sandpaper, making it useless after just a few passes. You also run the risk of removing some of the detail as the wood is exposed. You knew it all along, didn’t you?